Create Reservation from Backoffice
Why and when?
When a Reservation is initialized its tickets are locked until the Reservation expires.
In order to minimize tickets contention Alf.io limits the number of tickets (default 5, configurable) that can be purchased in a single Reservation from the Public ticket shop.
As event organizer you can easily overcome this limitation by creating reservations through the Backoffice for as many tickets as you need.
To create a Reservation from the Backoffice:
- Access the Create Reservation tool
- Fill in Contact info
- Insert the attendees and assign them to a Ticket Category
- Save the Reservation and View it
then you can either:
- Leave the reservation Pending and share the link with the contact person, so that they can complete (and pay) it, or
- Confirm it and then Send tickets to the attendees
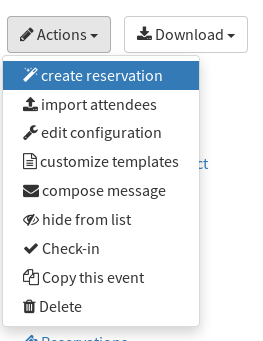
Access the Create Reservation tool
Go to the event detail page and click on Actions -> create Reservation
Fill in Contact info
Enter the data of the person you’re in contact with. This is usually the person who will take care of the payment.
Insert attendees
If you know the names and emails of the attendees linked to the current reservation you can either insert their data manually or upload them through a CSV file.
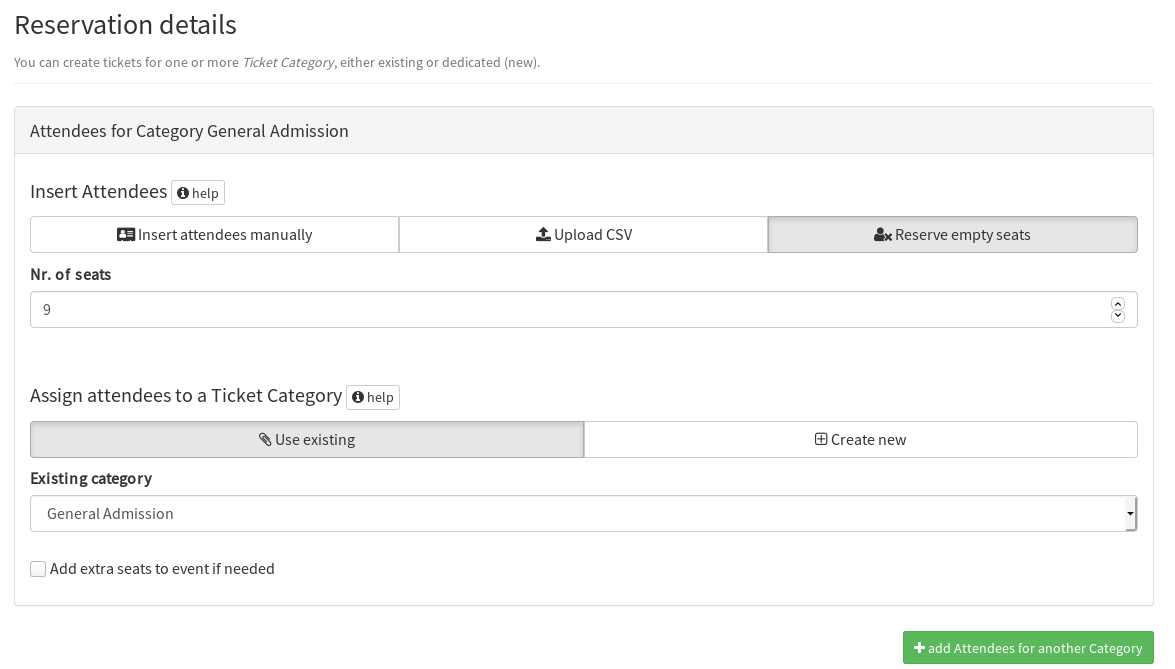
In case you do not know their data yet, you can Reserve empty seats by simply entering the number of attendees.
Assign attendees to a Ticket Category
Attendees must be assigned to a ticket category.
You can either select it from the list of categories you created while configuring the event, or assign them to a new category that you create on the fly.
In the same reservation you can distribute attendees in more than one category, just click on the add Attendees for another Category button.
Save and continue
Once you are done assigning attendees to categories click on the Save and continue button and, if everything is ok, you’ll land on the Reservation details page.
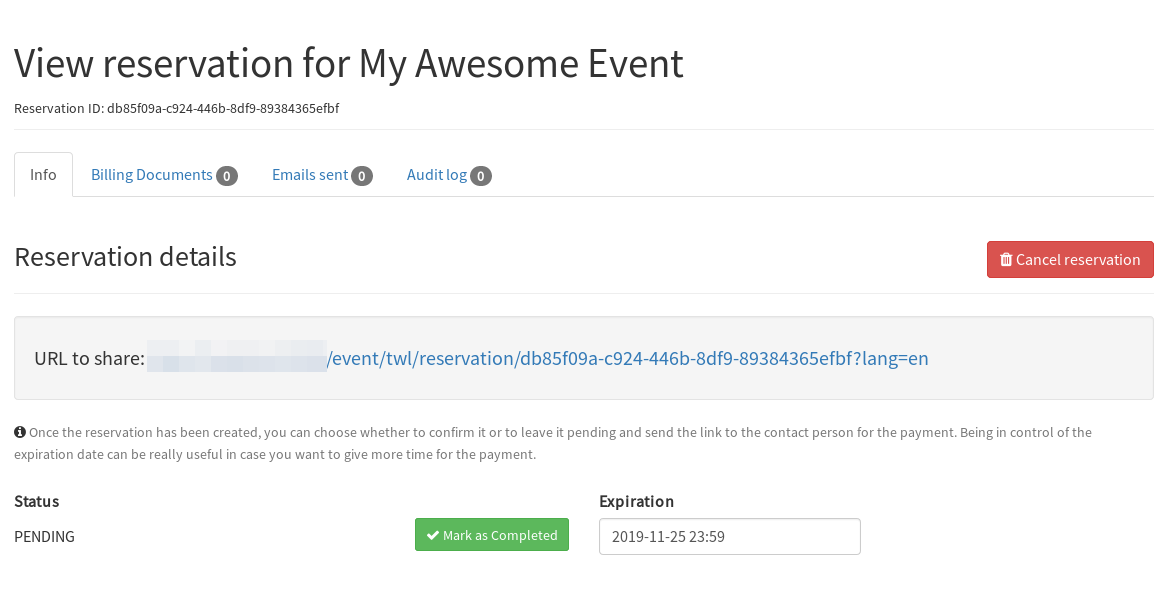
In case the reservation has to be paid:
- leave it in status PENDING
- send the URL to share to the contact person for the payment: following the link the contact person will be able to complete the payment
- update the Expiration date of the reservation, if needed: by default it is set for the end of the following day (tomorrow at 23:59)
Expiration date
By default, custom Reservations are set to expire at the end of the following day. If you want to modify that, just select another deadline and click on Update
In case the reservation is paid already (meaning that either the tickets are free of charge or you received the money due) you can confirm it by clicking on the Mark as Completed button.
GDPR & Privacy Policy
If you create a new Reservation from the Backoffice, and then click on Mark as Completed, please make sure that the attendees are aware and agree to your privacy policy, as Alf.io won’t ask them to accept it.
Send Tickets
When you confirm a reservation by clicking on Mark as Completed, Alf.io won’t send the tickets automatically.
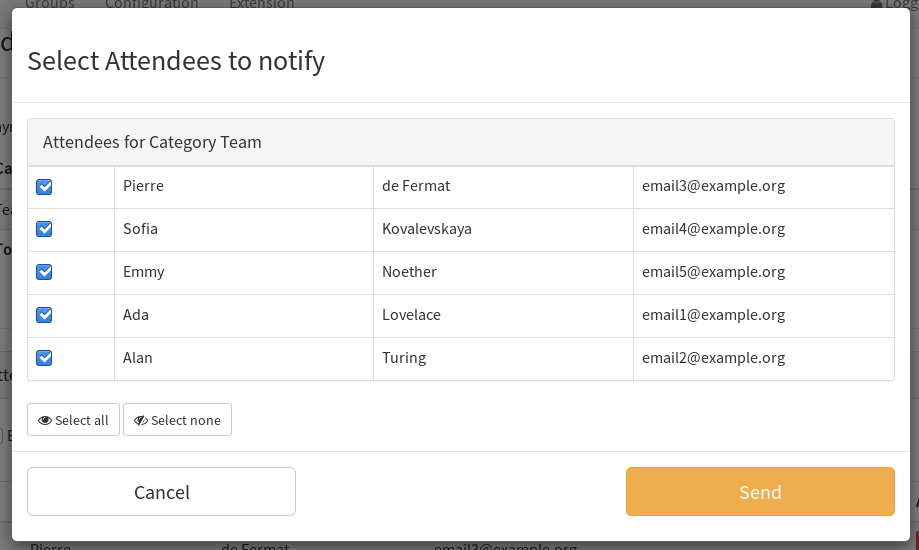
You have to send them manually by clicking on Send tickets via email
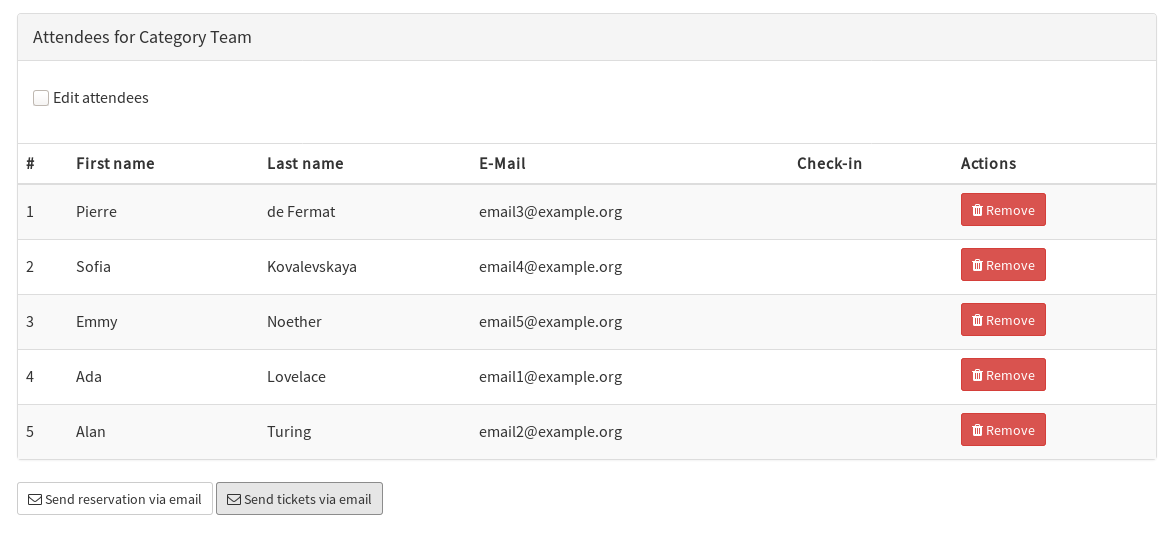
once clicked on the Send tickets via email button, you can choose which tickets you want to (re)send. In this case, select all
Sample use case
To explain the tool even further, let’s simulate the following use case.
Let’s say that you’re organizing “My Awesome Event”, where you have 200 seats distributed as follows:
- 185 seats available for attendees, 100 EUR each
- 10 seats for Speakers
- 5 for the organizing team
You create an event with the following categories:
| Category | Visibility | Price | Max Seats |
|---|---|---|---|
| General Admission | Public | 100 | Dynamic |
| Speakers | Hidden | 0 | 10 |
| Team | Hidden | 0 | 5 |
Then:
- Example 1: Ms. Jane Doe, member of Example Org., reaches out because she wants to attend your event along with 9 colleagues, and by company policy they must buy all the tickets with a single transaction (you know, Purchase Orders). Moreover, since you’re very happy that Example Org. will send 10 people to your event, you decide to give them one ticket for free, that is, 10% discount.
- Example 2: You want to register the organizing team so that you all have a pass for the event.
Example 1
The contact person for this Reservation is Jane Doe, as she will take care of the payment. So you’ll insert her name in the relevant section.
Since you don’t know how the name of the attendees in advance you simply reserve 9 empty seats for the existing General Admission category.
In the “Reservation Details” section, fill up the form as shown in the picture:
Now it’s time to add the free ticket to the reservation:
- click on the add Attendees for another Category button
- same as before: you don’t know the name in advance, so you reserve 1 empty seat
- Since you don’t have (yet) a “Group discount” category, this time you need to select Create new and enter the name and price of the category

Please note that:
- the “Group discount” category will be created as “hidden”
- you can reuse the “Group discount” the next time you create a Reservation, if needed.
Now you can click on Save and continue and you should land on the Reservation Detail page.
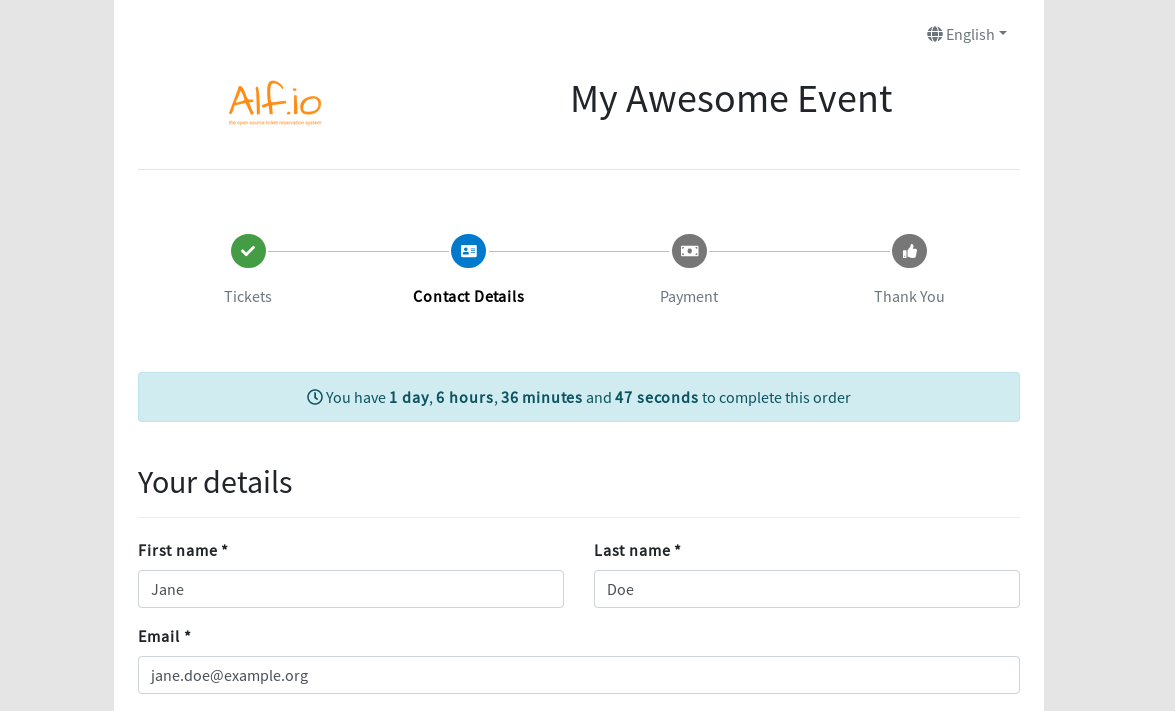
Adjust the expiration date of the reservation accordingly and share the Reservation Link with Ms. Doe, so that she will be able to complete the Reservation and pay.
This is what Ms. Doe will see by clicking on the link:
Example 2
This time you can set yourself as contact person.
On the Reservation details section, you can fill all the Team’s data and select the existing Team category.
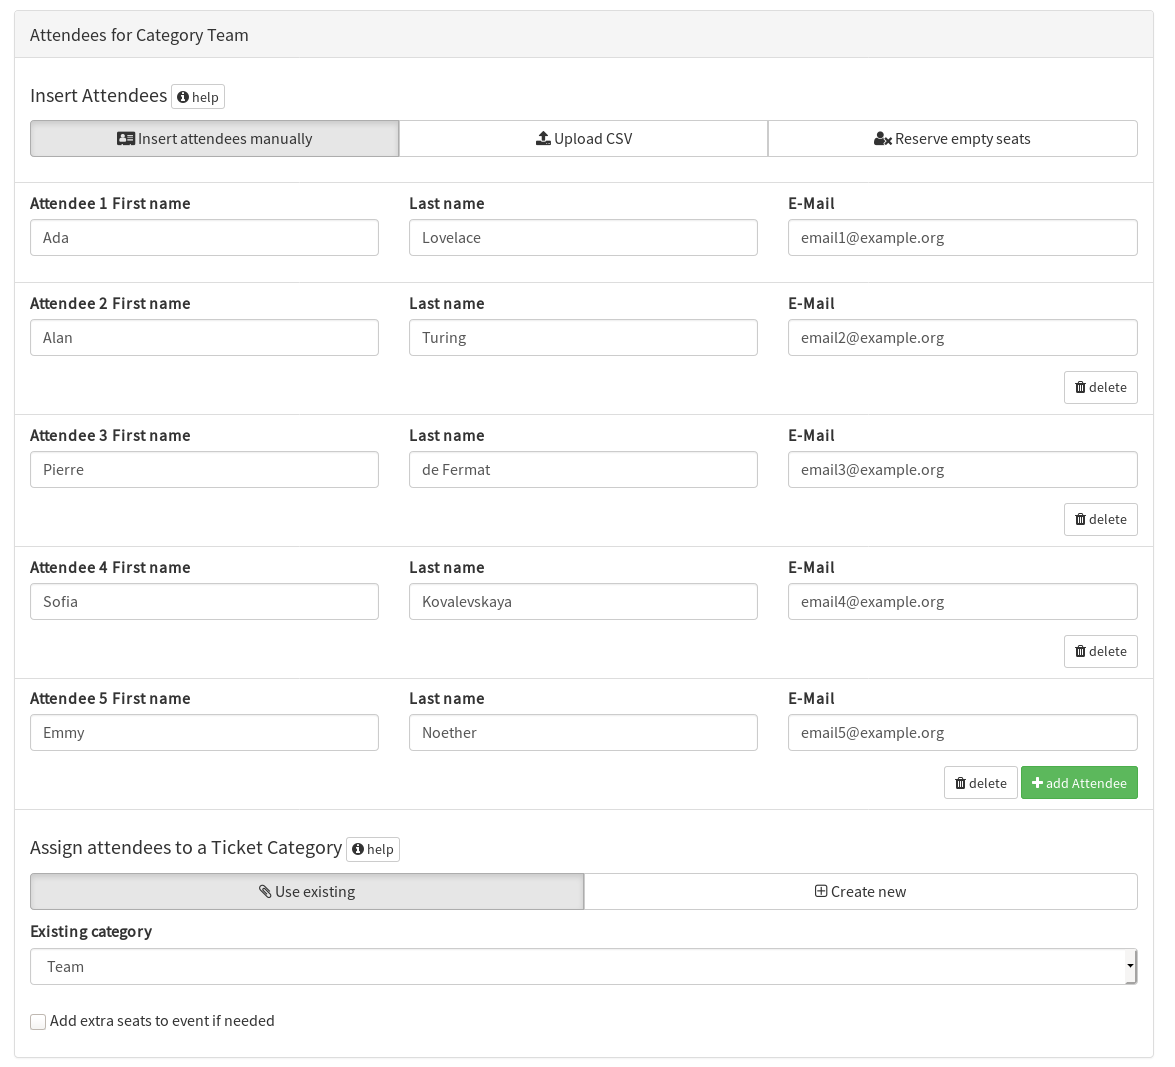
Now you can click on Save and continue and if everything’s OK, you’ll land on the Reservation Detail page.
This time you can confirm the Reservation directly. To do so, click on Mark as Completed.
The page will reload and the status will be updated to COMPLETE.