Custom Offline Payment Methods
Custom offline payment methods allow you as an organizer to define your own payment methods which users can select during checkout. The confirmation of payment for these methods is a manual process similar to the Bank Transfer payment method. Once a user selects their payment method of choice, they will be given a set of instructions on how to complete the payment. The organizer then manually verifies the attendee’s payment and marks the reservation as “Confirmed”, giving them access to the event.
Video Demonstration
If you would like to see a visual walk-through of the feature, you can view the video below.
Configuring custom payment methods
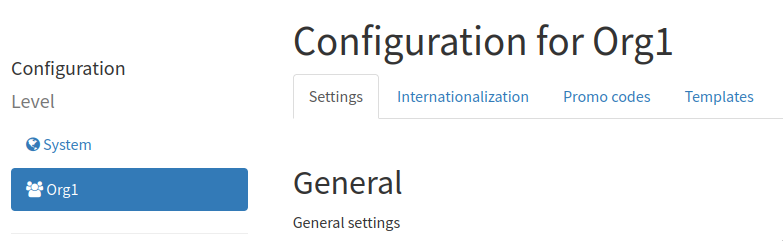
Start by navigating to the configuration section for your organization. In the example below the organization we are using is “Org1”.
Close to the bottom of the page you will see a section card called “Custom Offline Payments”. This is where we will be configuring the payment methods for use in our events.

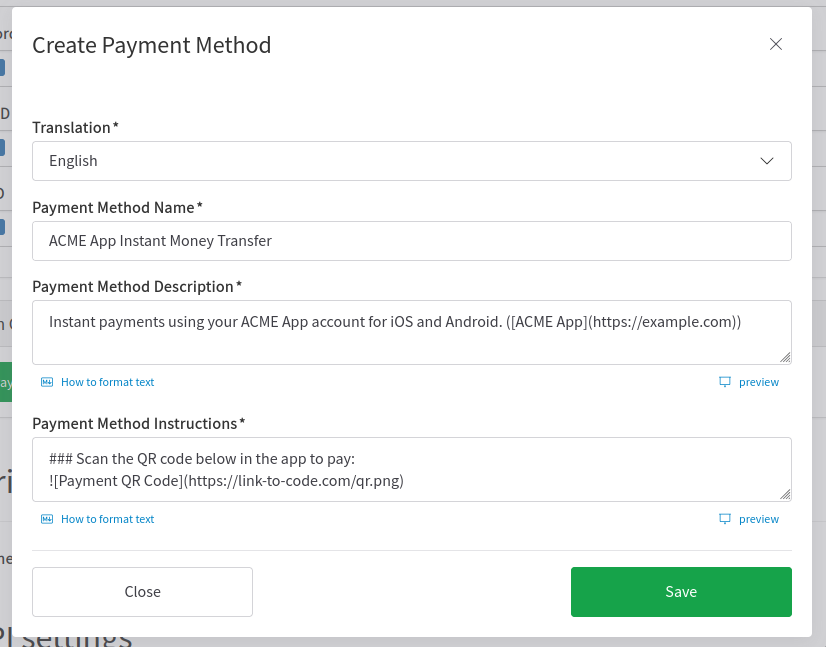
After pressing “New Payment Method” you will be greeted with a dialog asking for some basic information including what language the initial translation is, as well as a name, description and instructions. The name and description are shown on the checkout page when the user is selecting their payment method. Once the user has selected the payment method during checkout, we will present the content in the instructions field so they know how to complete their payment. The description and instructions field support markdown, allowing you to change the formatting of the text and to insert images and links. In the example below I have included a link in the payment method description for users to find more information about the payment method, as well as a QR code in the instructions for users to scan to complete their payments.
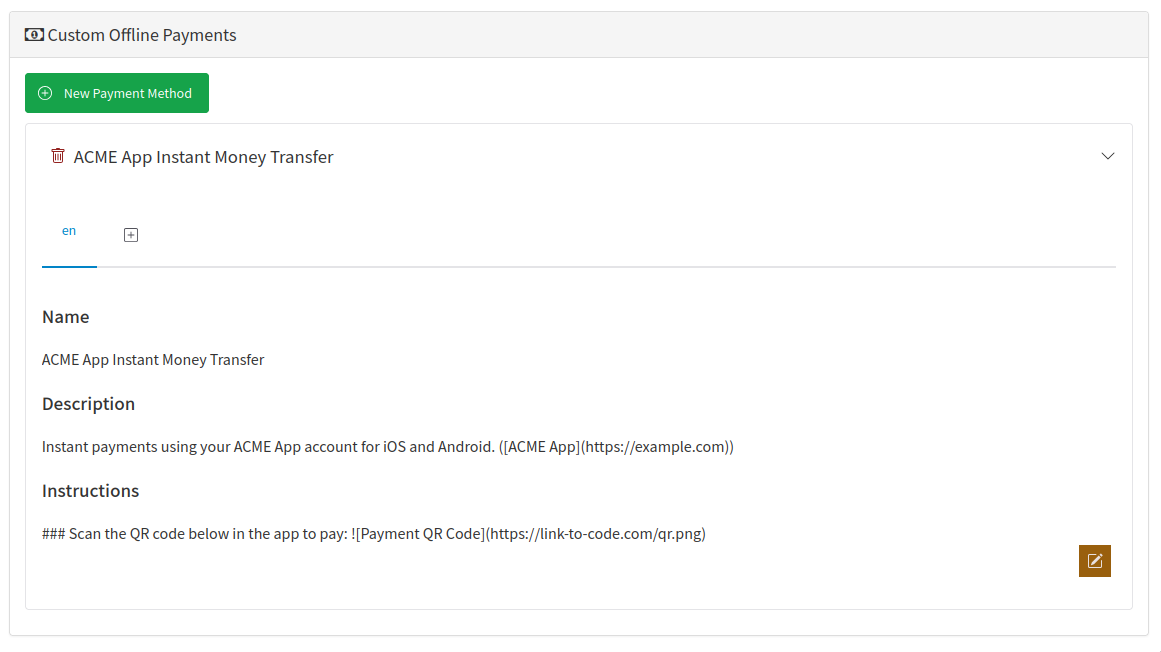
Once saved, you will now see your new payment method in the Custom Offline Payments card. You can expand each item in the list to see its contents. You can add additional translations and edit existing ones as needed.
Configuring an event to use custom offline payments
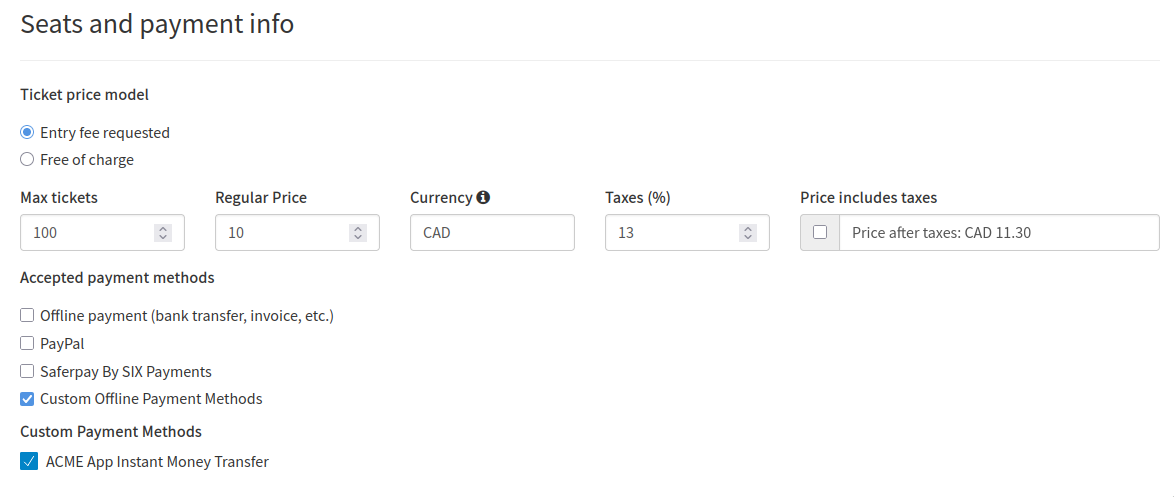
Create a new event as normal or edit an existing event. When you arrive at the “Seats and payment info” section, you will see a new checkbox under “Accepted payment methods” called “Custom Offline Payment Methods”. Checking this field will present a new list including each custom payment method you have configured in your organization. Select the custom payment methods you would like to use for your event. In the example case shown below, we have selected the “ACME App Instant Money Transfer” payment method we created in the last section.
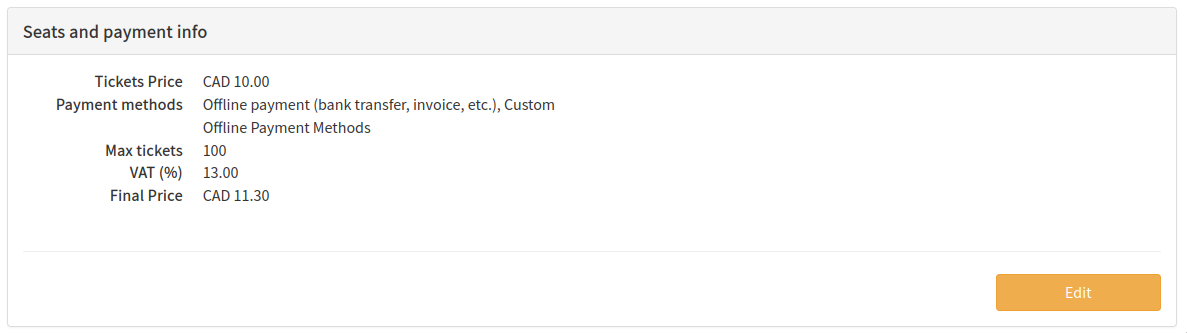
Once you finish creating your categories and adding other event configuration as needed, you can save the event. Your event will now be configured to use the custom payment method. You can change your payment method selection as needed by using the “Edit” button under the “Seats and payment info” section.
Disabling custom payment methods for certain categories
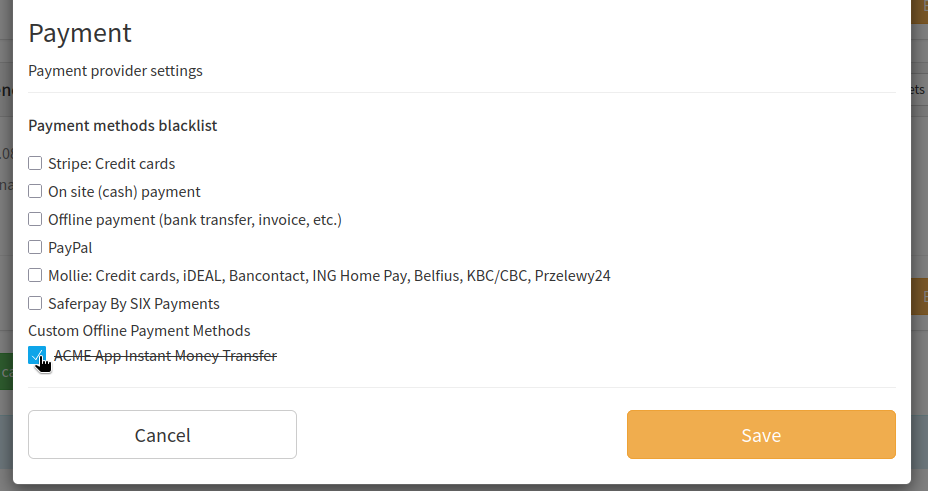
If there is a particular custom payment method you do not want to be accessible for certain categories, you can disable it by pressing the “options” button on the category, selecting the payment method you would like to disable, and pressing “Save”. Now if a user selects the category, your disabled payment method will not show as a payment option.
Validating payments as an organizer
When a user completes the checkout process using a custom payment method, they will be given instructions to complete their payment outside of the Alf.io platform. These pending reservations will show in the event admin panel under “Reservations” -> “Payment Pending”.
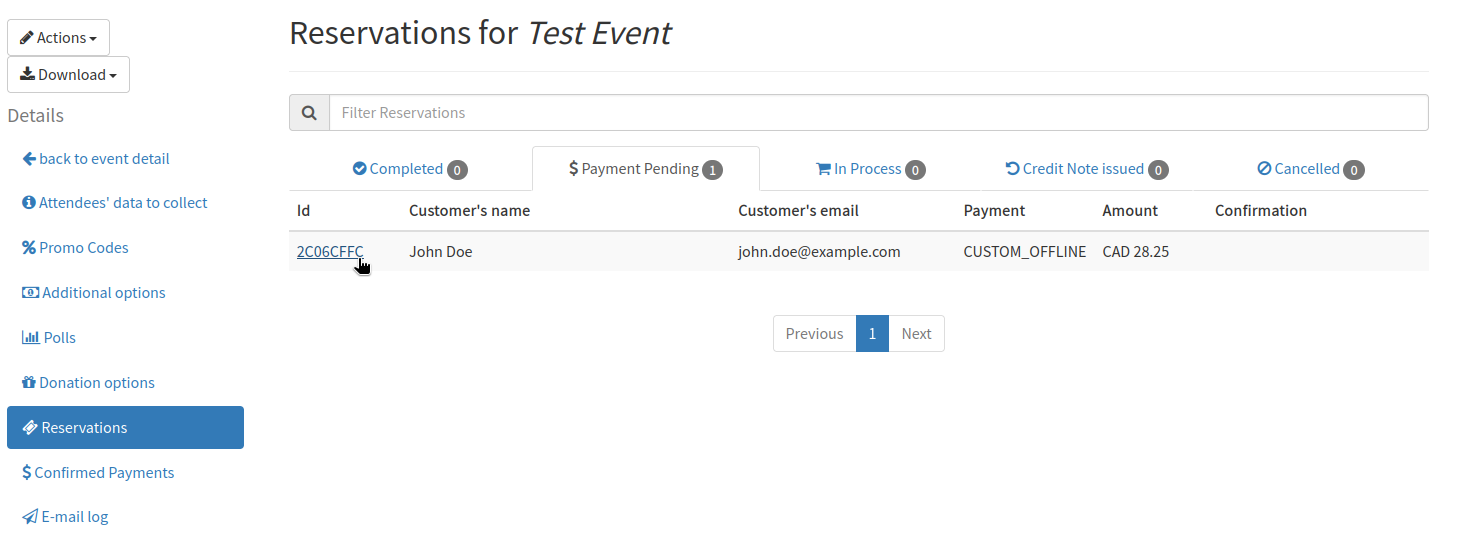
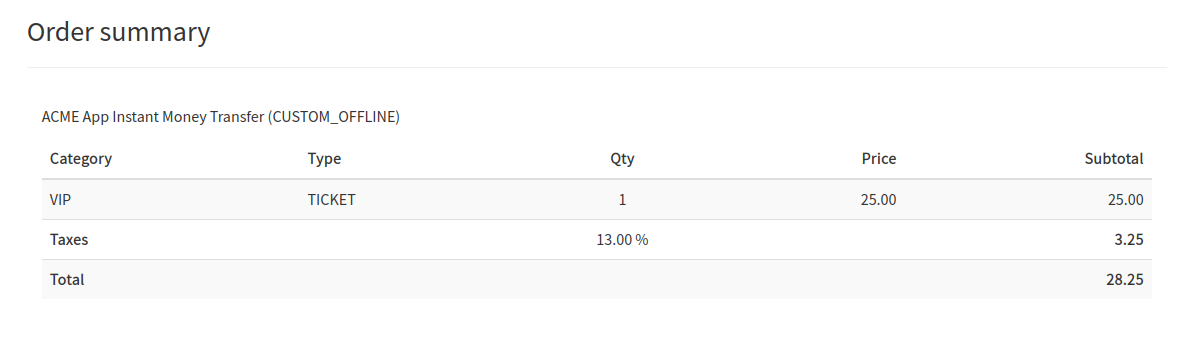
You can click on the ID of the reservation to view its details. Under the “Order Summary” section we show the name of the custom payment method the user selected. Using the information provided, you can validate externally whether the user has paid.
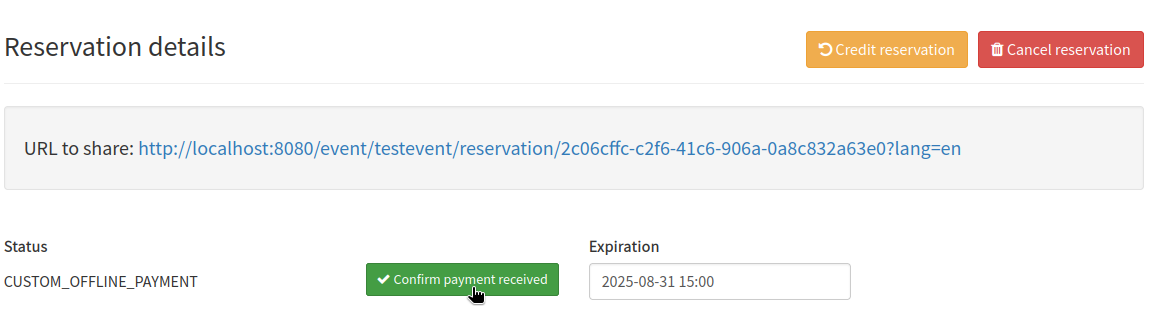
Once you have validated the payment, you can complete the payment process and provide the user with their tickets by pressing the “Confirm payment received” button.
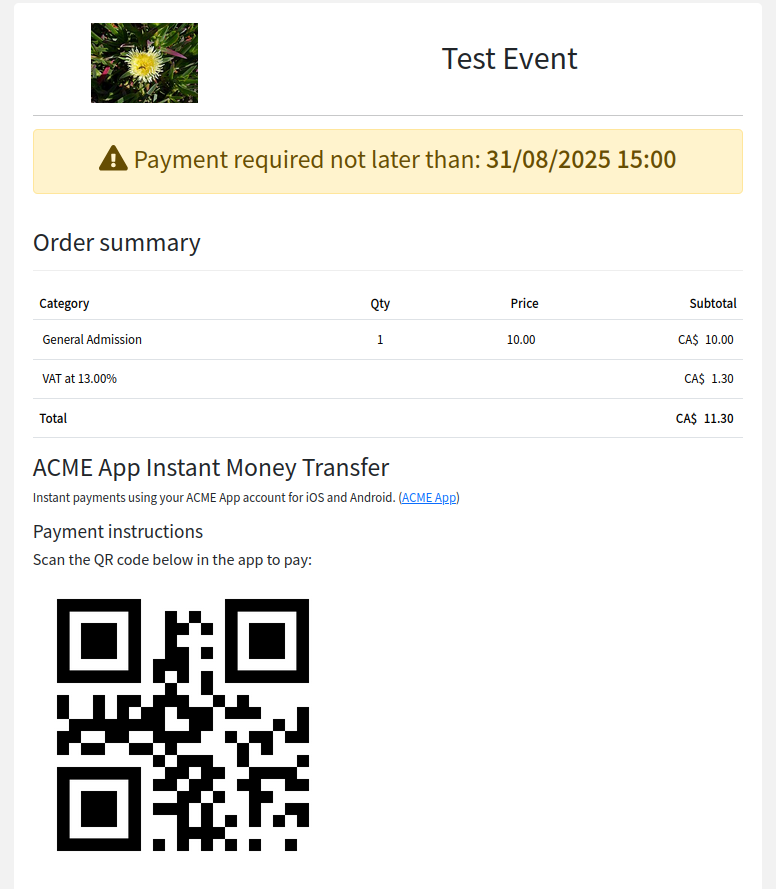
User Checkout Process
From the user’s perspective, once they have selected their tickets and entered in the attendee information, they will be presented with a set of payment options including our custom offline payment method. The description we configured previously is shown to give the user more context for the payment method. In our case we used markdown to provide a link to the payment app. If you have configured multiple translations for your payment method, the translation shown will match the user’s language.
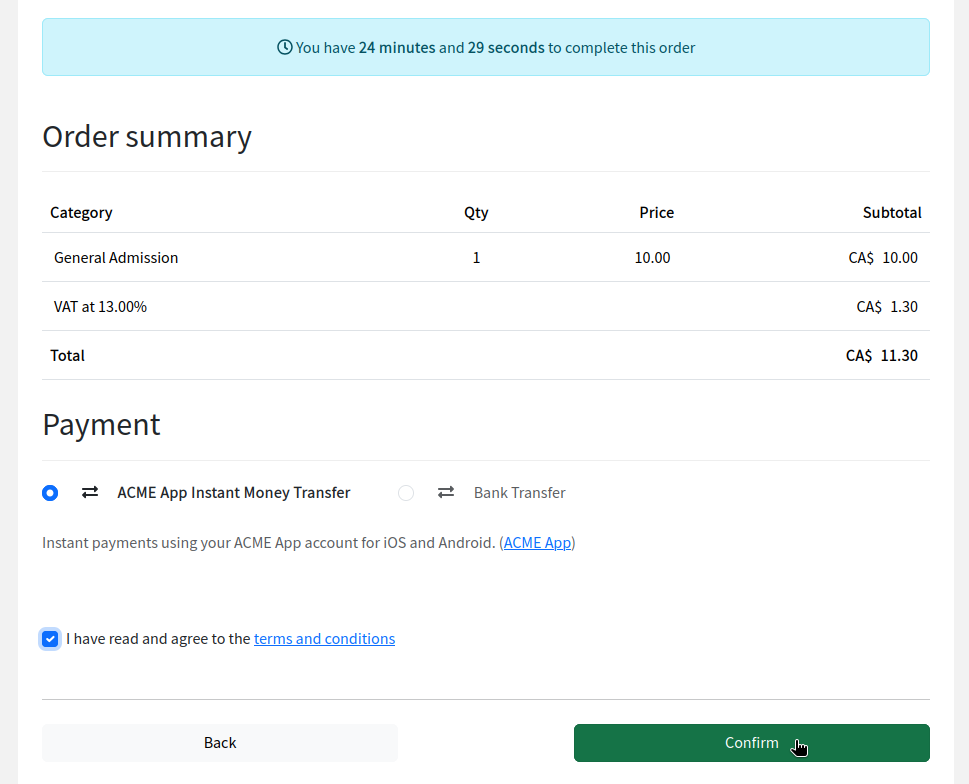
Once a user confirms their payment choice, they will be shown a “Payment Pending” screen including instructions on how they can complete their payment. In our case we have provided a QR code through markdown which is displayed for users to complete their payment through the app.
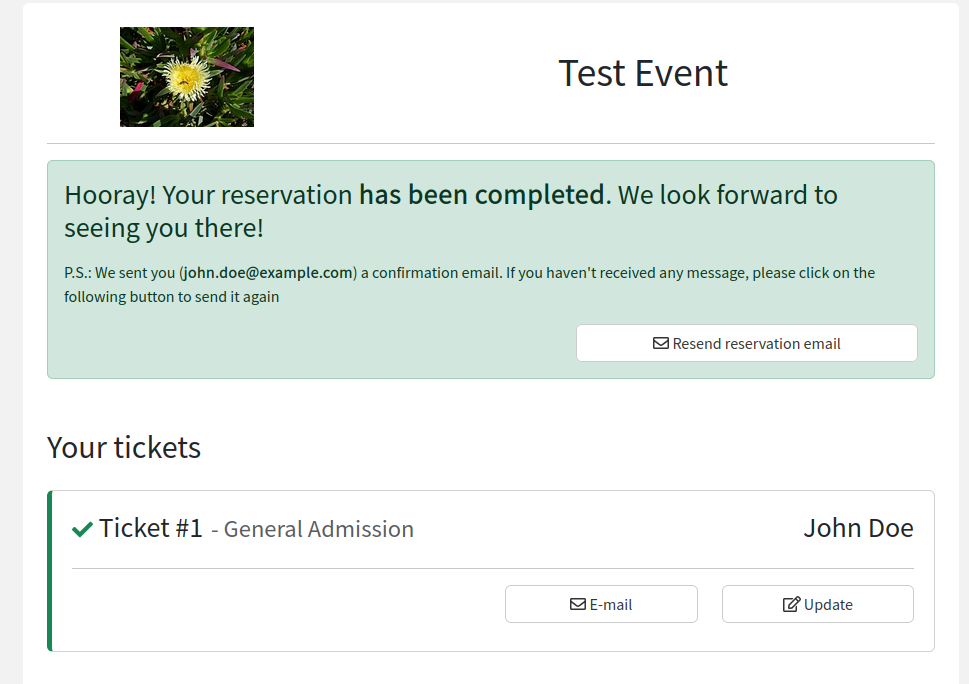
Once the user has completed their payment and an operator has confirmed the reservation, the user will receive an email including their tickets and the pending payment screen will change to a success screen. This screen informs the user that their reservation has been completed and they have been successfully registered for the event.